This article contains the following information:
Student Account Creation
All user accounts (students & admin users) will be created in EdReady when a user clicks to access EdReady from NCEdCloud (more info here).
Important: student accounts cannot be uploaded or created by an Admin: all account creation must happen through the NCEdCloud integration. A student must access EdReady via NCEdCloud for their account to be created: an Admin can edit the account once it has been created.
Editing Student Accounts
1. Login to EdReady through NCEdCloud
2. Click the Manage Account button from your EdReady dashboard to access the administrative pages in EdReady.
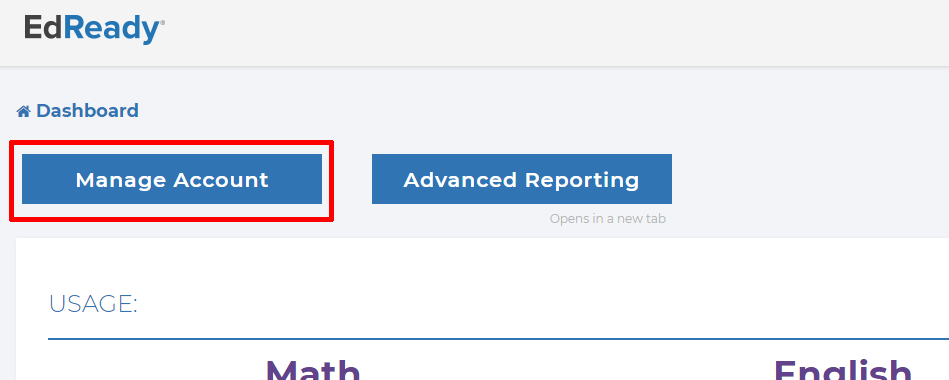
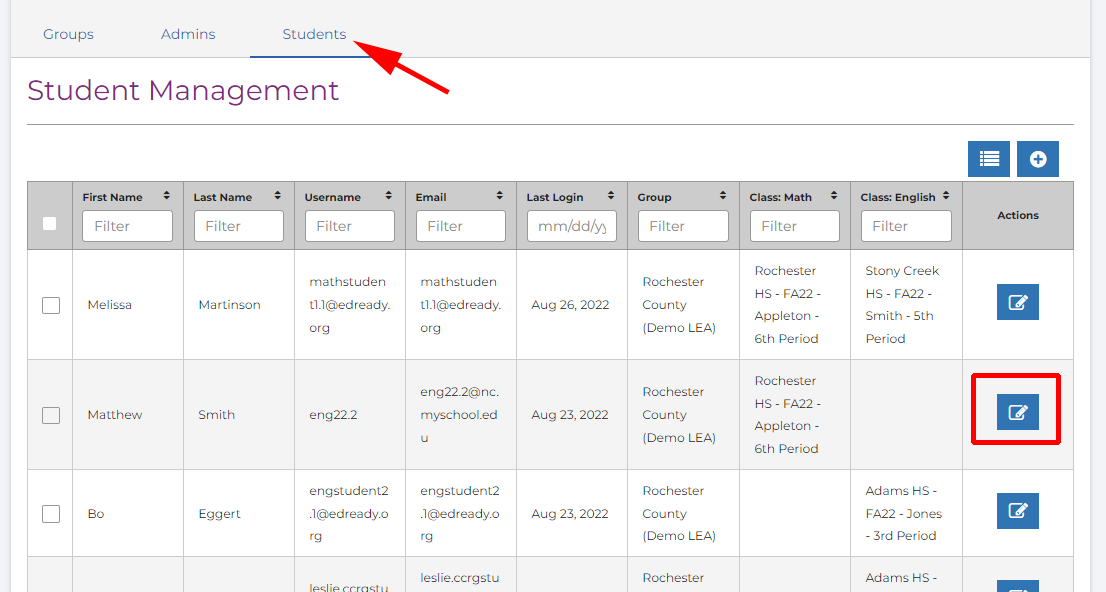
3. You will land on the Groups tab: click on the Students tab
4. Click the Edit icon (![]() ) for the user you want to update
) for the user you want to update
Note: students can edit their own school and class assignments and should be encouraged to do so. You can find instructions HERE, but Admin Users are also welcome to add/ edit values as needed for student accounts (instructions below).
School Assignment
Your students should have the appropriate school(s) assigned: this may be applied automatically through the NCEdCloud integration, but we suggest that you encourage students to check/update this value. Confirming that students have the appropriate school assigned will ensure that the appropriate admin users (ex: their teacher) can see their data.
Note: the master list of schools that was imported into EdReady can be found at in the Active LEA (school district) Schools Report at EDDIE (http://apps.schools.nc.gov/eddie). Currently EdReady only displays the School ID.
Follow the Editing User Permissions steps above to edit the student's account, then:
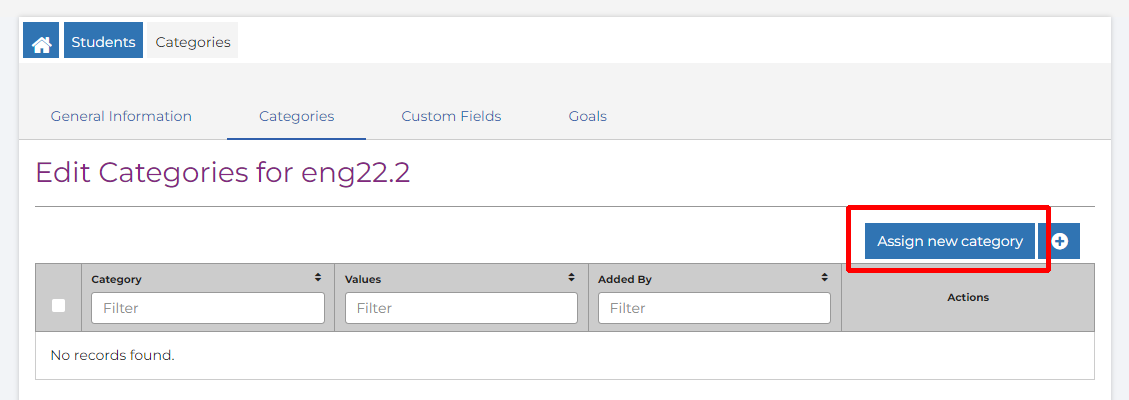
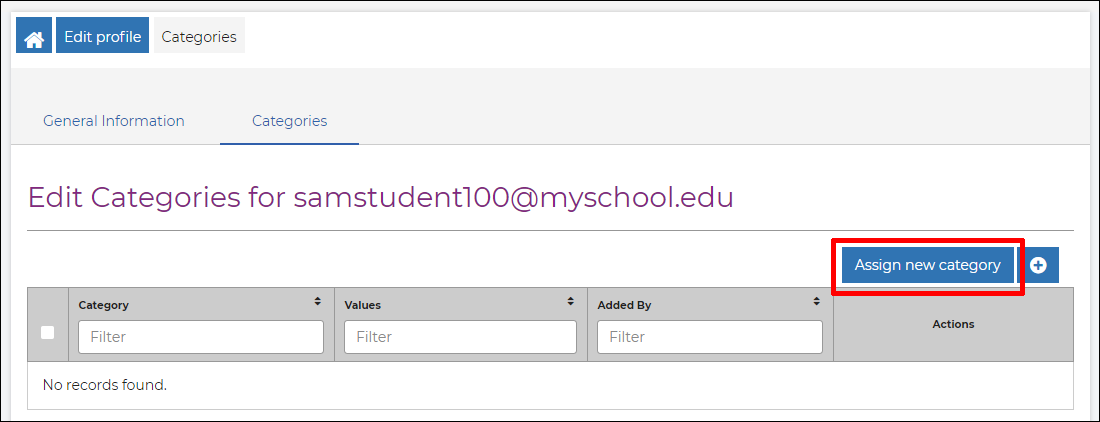
a. Click on the student's Categories tab
b. If you don't see a School listed here, click the Assign new category button.
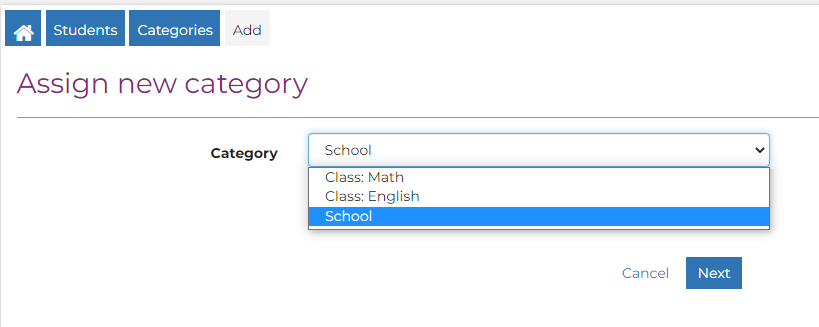
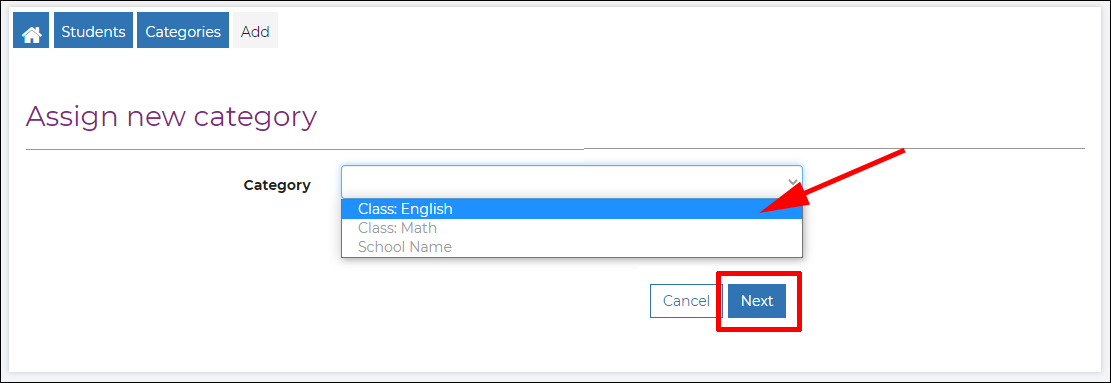
c. Select School from the dropdown menu, then click the Next button
d. You will see an "Assign a value to category: School" table displayed. Click the Create Value button above the table.
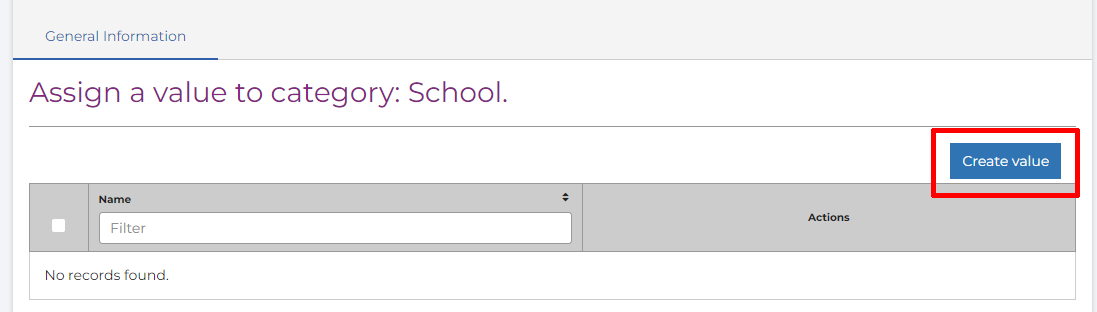
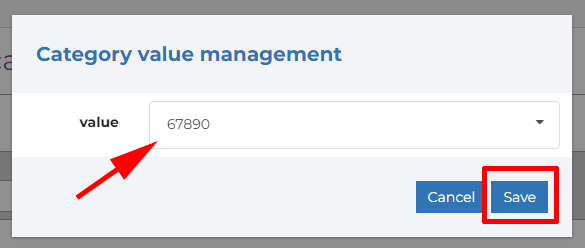
e. A pop-up window will open. Select the School from the dropdown menu, then click the Save button
If the user's School assignment changes, you can delete (![]() ) the assigned value and add the correct value.
) the assigned value and add the correct value.
Assign Sections
Note: before applying sections to a user's account, you must set up sections for your LEA. You can find more details here: Create Class Sections.
Follow the Editing User Permissions steps above to edit the user's account, then:
a. Click on the user's Categories tab
b. Click the Assign new category button
c. Select Class: Math or Class: English from the dropdown menu, then click the Next button
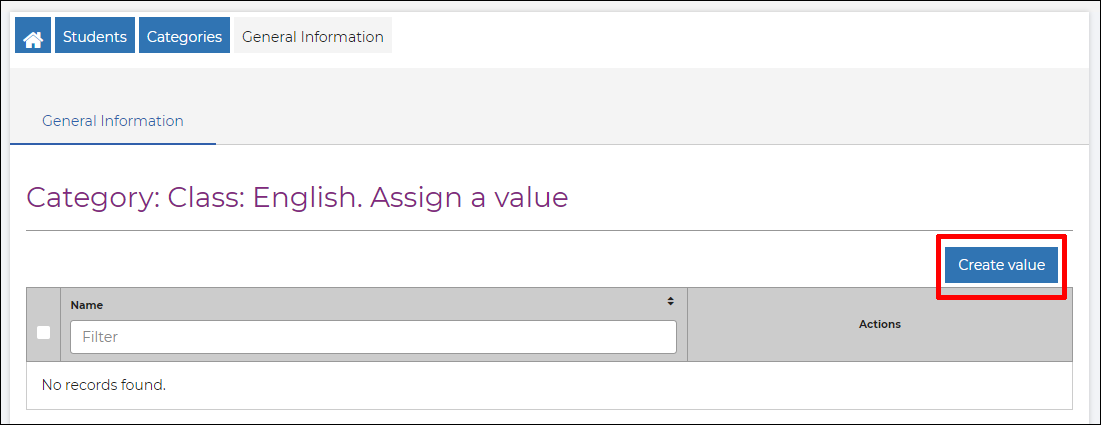
d. Click the Create Value button above the table
e. A window will appear: Select the Class from the dropdown menu.
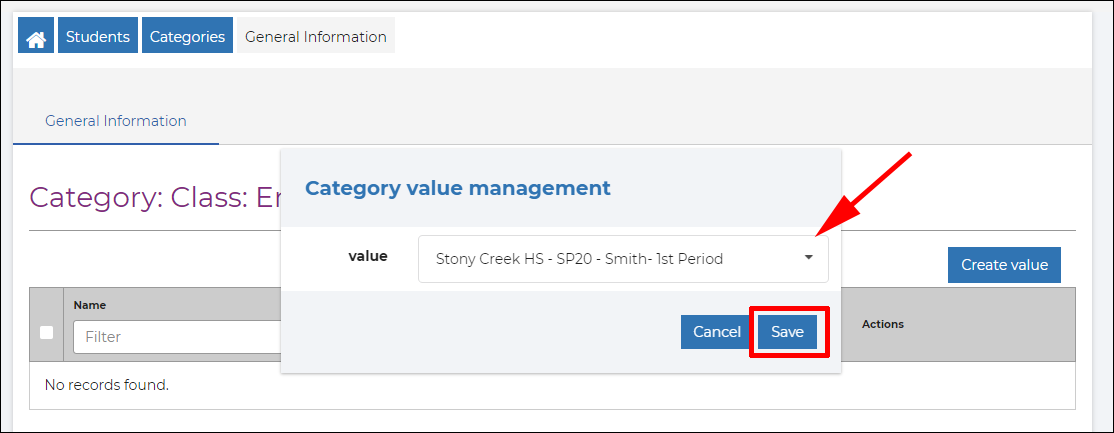
e. Click the Save button
f. Click Categories in the breadcrumbs to return to the main Categories tab: you will now see the Class selection(s) listed
If the user's section assignment changes, you can delete (![]() ) the assigned value and then follow the steps above to add the new value.
) the assigned value and then follow the steps above to add the new value.